Hi, David Child here. I wanted to do something a bit different with this blog post. Instead of talking about music or art or movies (that’s pretty much been the scope of this band’s blog so far), I wanted to provide a little IKEA Hackers-style How To guide on building the standing desk I use. If you’re not into How To guides, skip this post. I promise the next one will be about MANWOMANCHILD. Anyway, here goes…
The year was 2012 and standing desk fever was sweeping the nation — or at least a small number of articles were written about the benefits of standing and a handful of people who had nothing better to worry about chose to pursue the idea somewhat seriously for a few months before inevitably returning to sitting. My friends, I was one of those people. (And I still am. I’ve actually just made it to the one-year mark and I still do almost all of my recording standing up.)
I looked around for a cheap standing desk, and there were a bunch of options, though nothing that would accommodate all of the stuff in my home studio. Also, all of the standing desks on the market were shockingly expensive. The New York Times had recommended a $4,000 desk. Feeling ambitious, I decided to build my own out of IKEA shelving.
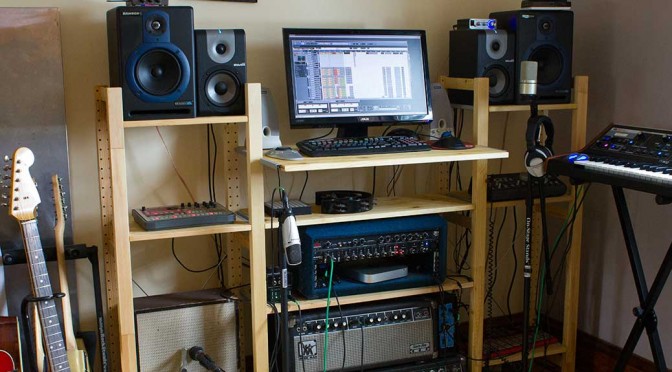
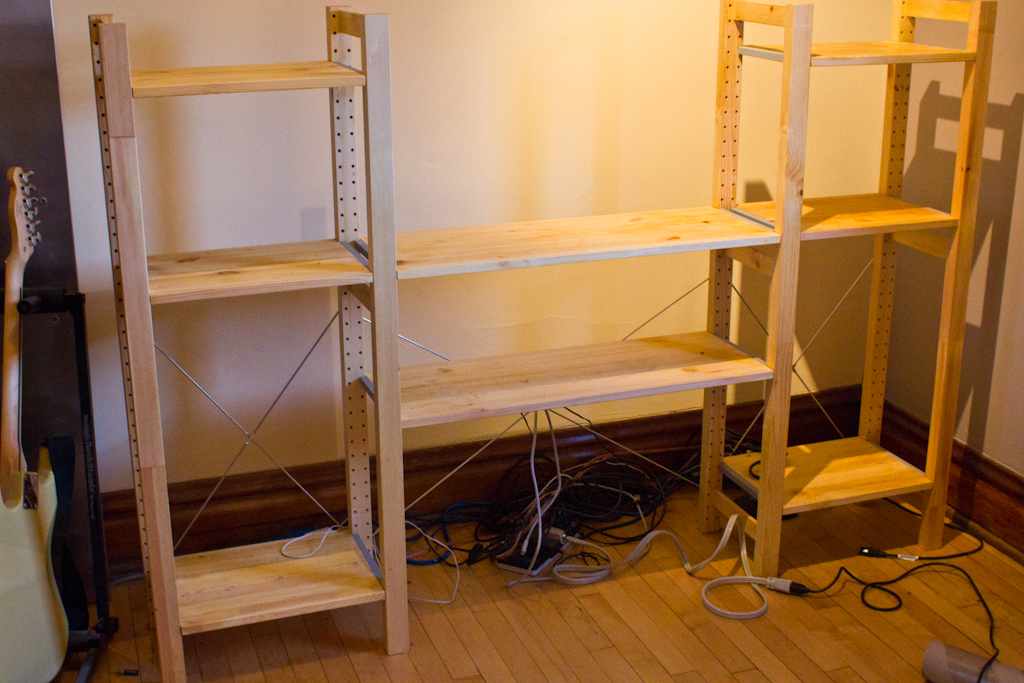
Before you embark on this journey with me, you should be forewarned that the finished product looks like this:
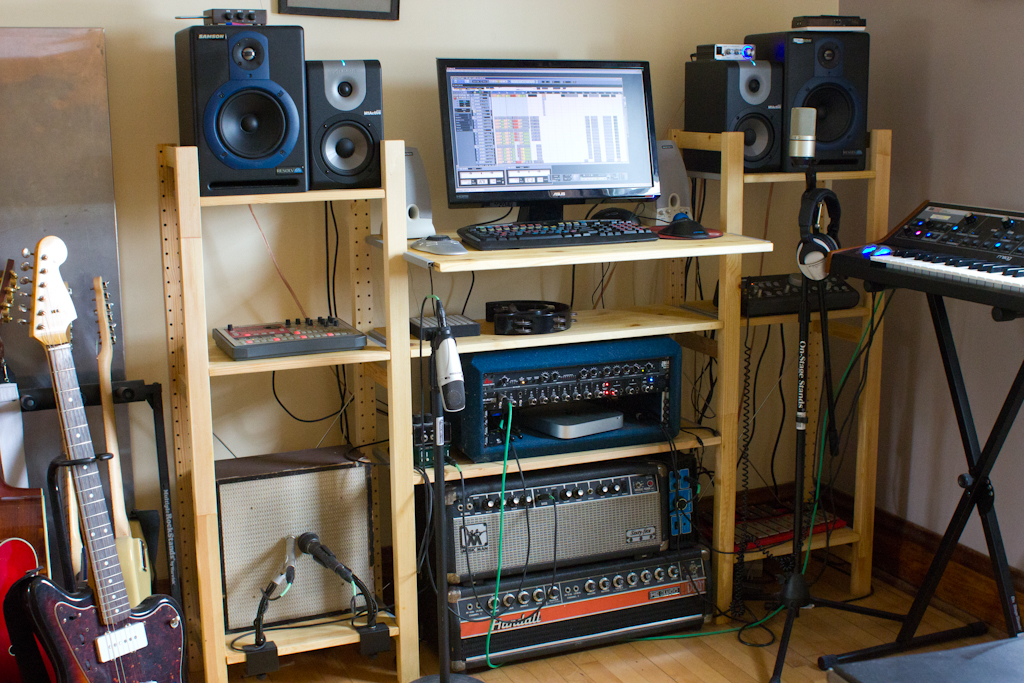
It’s not the most beautiful thing in the world, I know, but I’ve been extremely satisfied with it. It contains all of the studio gear I use (my computer, my speakers, my amps, my 1 x 12″ speaker cabinet, etc.) and, most importantly, it’s exactly the height I wanted. (All of the articles I’ve read say that the shelf should be exactly the height of your elbows.)
Construction
So, you ask, how can I own one of these beauties? Well, since you asked, the whole thing is based on the IVAR Shelving System. The specific parts that went into making this are as follows:
- 4 x IVAR 12“ x 49” Side Units ($8.00/pc): The four side supports.
- 6 x IVAR 17“ x 12” Shelves:
These are the side shelves that hold up the speakers and various other pieces of equipment in the photo above. - 2 x IVAR 33“ x 12” Shelves: These are the two lower shelves in the middle.
- 1 x IVAR 33“ x 20” Shelf ($12.00/pc): The top shelf, that the computer monitor sits on.
- 2 x OBSERVATÖR 28″ Braces ($5.00/pc): These are used to hold up the two sides.
- 1 x OBSERVATÖR 39″ Brace ($5.00/pc): This is used to hold up the middle shelving section.
I also bought a can of shellac so that I could protect the wood, but that’s really not necessary. Here’s what all of the parts look like on their own:
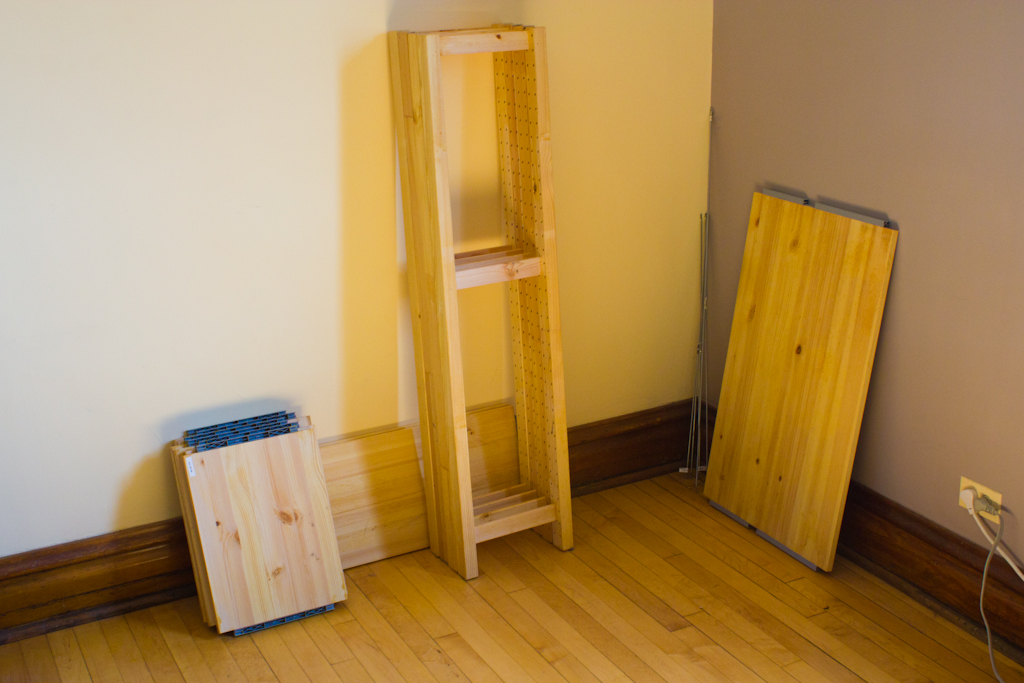
You’ll notice that my big shelf on the right-hand side of the image has two notches cut in it. Those were not there when I bought the parts. We’ll get to those later. I’m not going to go into a huge amount of detail about the basic construction of the shelf, because this part is fairly straightforward. You should know that I put the whole thing together on the floor without the extra-large top shelf. Here’s a photo of that:
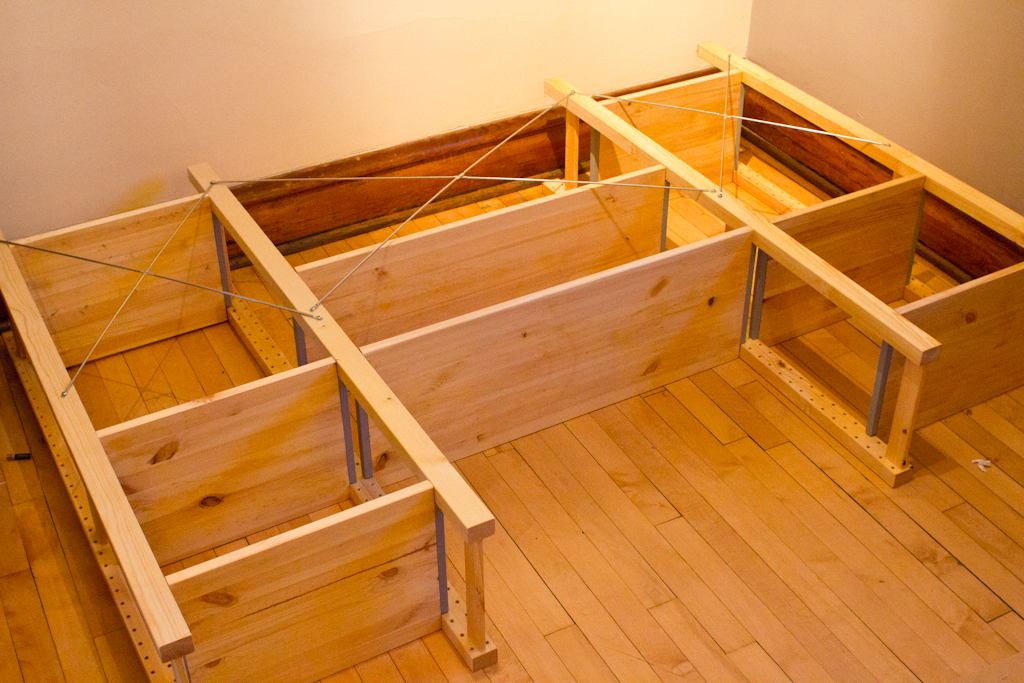
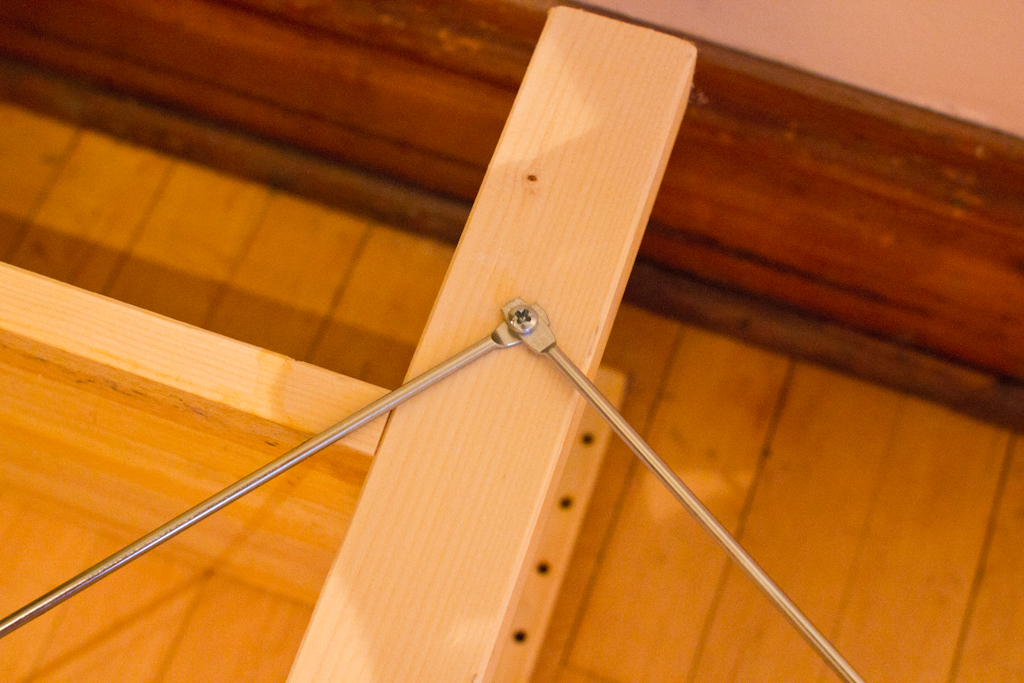
Attaching the 3 metal OBSERVATÖR cross-braces was an odd process. I used a level and a few square-shaped objects to make sure that the whole thing was at right angles. Then, I drilled holes in the side supports and screwed the braces in. The entire shelf (all three parts) are symmetrical but the top hole spots for the middle brace and the side braces don’t line up at all. This is normal. You can see what I mean in the photos that follow. This is the point at which the middle brace meets the side brace at the bottom:
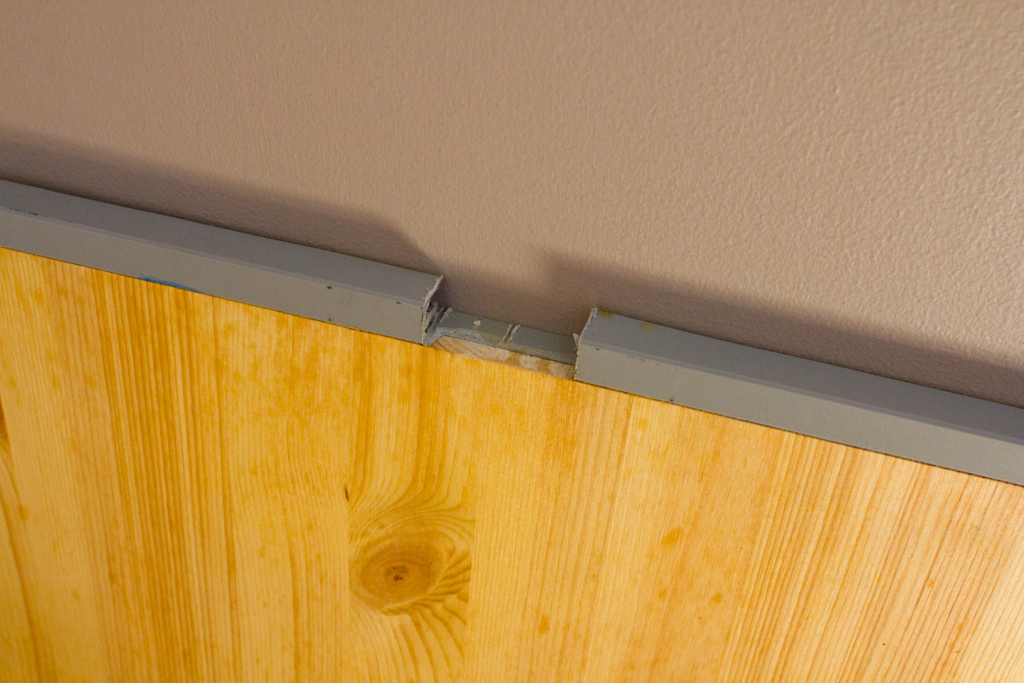
And this is where they meet at the top:
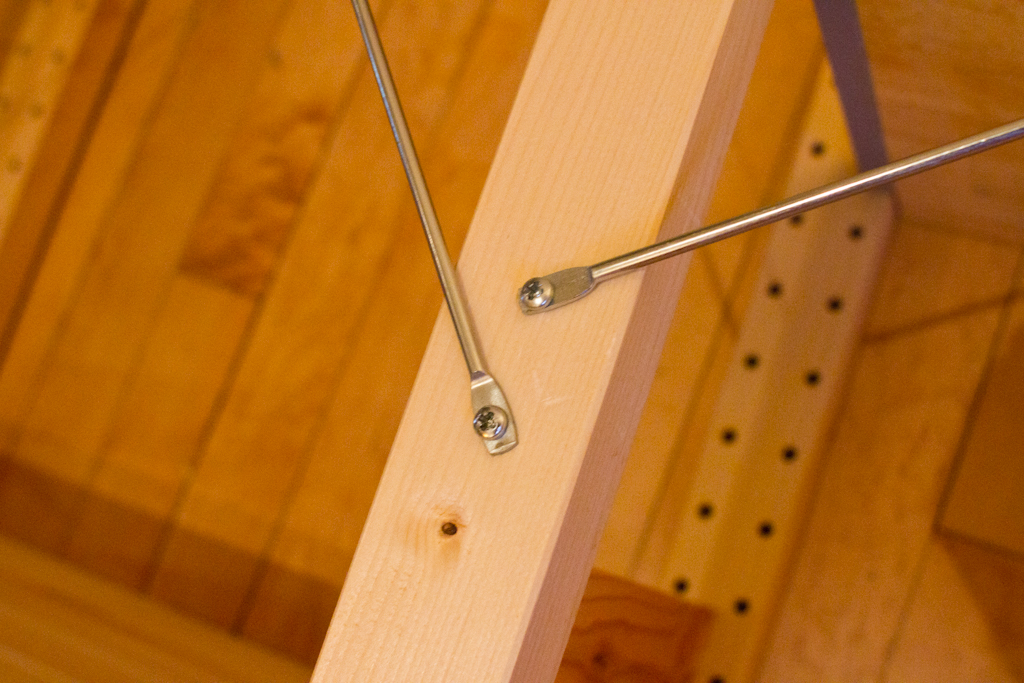
As I said, this is totally normal.
Once I had the whole shelf constructed, I upended it:
OK. The final step is to attach the large 33“ x 20” shelf, but before we can do this, we need to take a hacksaw (or other implement) and cut notches or rectangular chunks out of the plastic. This is what the notches look like:
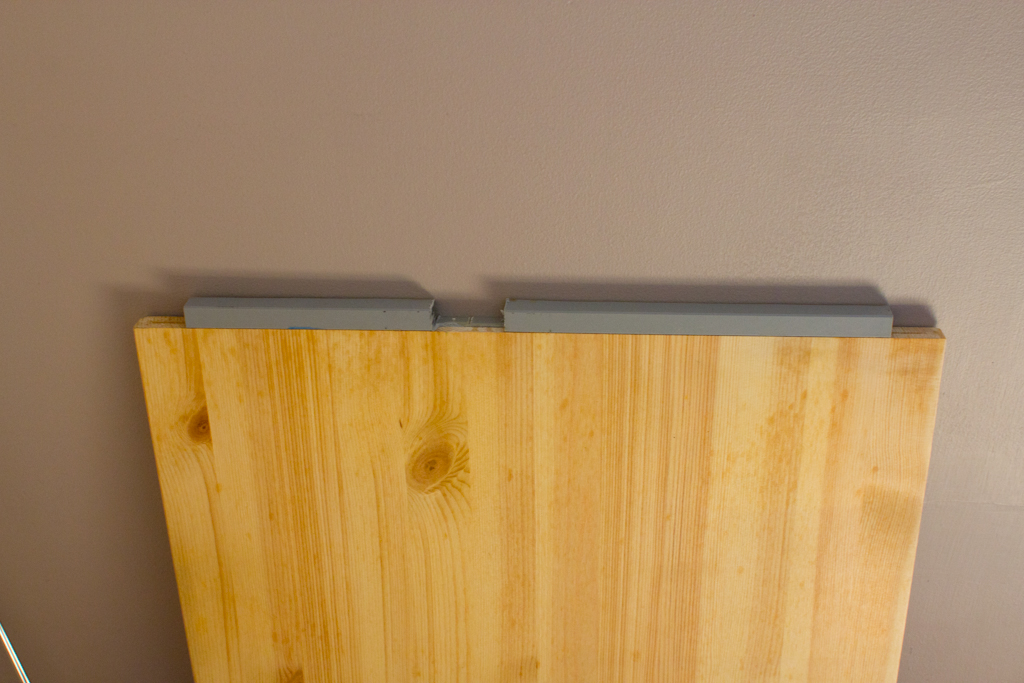
The best way to figure out exactly where the notches should be is to lay the shelf down on the floor next to one of the side-support braces and use the brace as a guide. (“Measure twice, saw once,” or whatever the expression is.)
Once your done, all you have to do is put that top shelf on and celebrate. Note: I actually attached my desk to the wall to keep it from moving while I typed, or from falling over if I applied too much pressure to that top shelf.
OK. That’s it. I hope you enjoyed this project guide.
–David Child